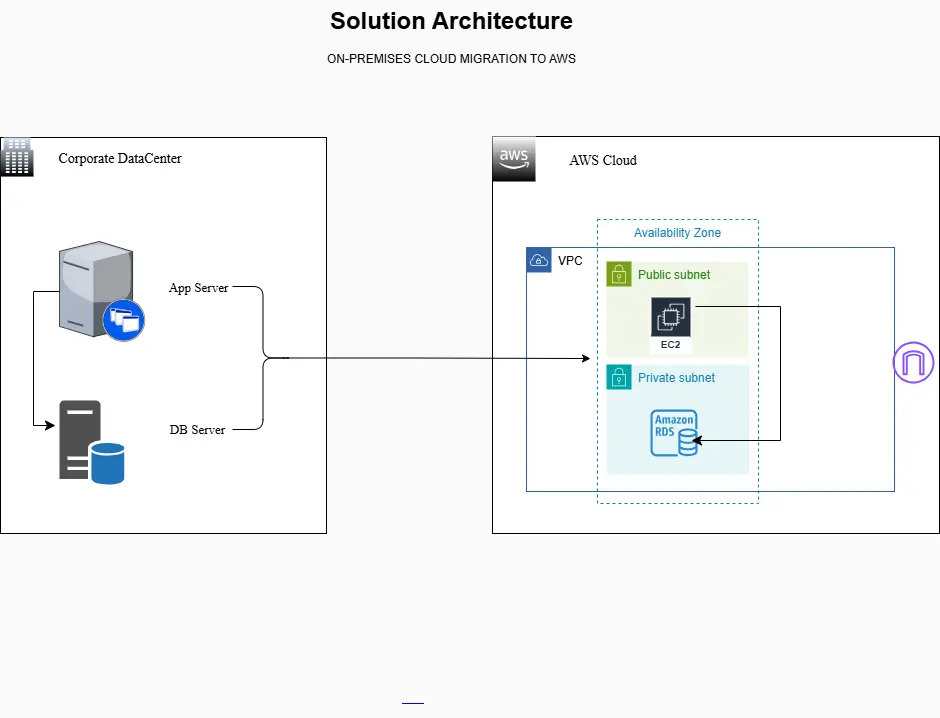
Successfully migrating workloads from an on-prem corporate data center to the cloud marks a significant milestone in cloud, scalability, and operational efficiency for any organization. The solution architecture involves migrating an on-premises application server and database to Amazon EC2 and Amazon RDS, using a VPC with public and private subnets, an Internet Gateway for internet access to the app, and validating the migration with a dry run and a cutover.
In this project, the on-premises application workload and its database are migrated to AWS using the Lift & Shift (rehost) model, preserving the existing architecture while gaining the scalability, reliability, and security benefits of the cloud.
Project Overview
The objective of this migration was to move an existing on-premises application and database workload to the AWS cloud while maintaining the application architecture.
What you need
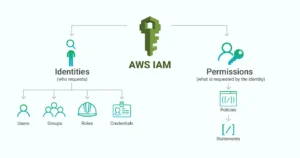
- AWS account + IAM permissions to create: VPC, subnets, IGW, EC2, RDS, security groups.
- Your app artifact (zip, repo, installer) and on-prem config values.
- Database engine known (MySQL/Postgres/MariaDB/SQL Server/etc.)
- A maintenance window for cutover.
Naming convention
Use a consistent name tag to keep it clean:
- kb-mig-vpc, kb-public-subnet-a, kb-private-subnet-a, kb-private-subnet-b, kb-igw
- kb-app-ec2, kb-db-rds
- kb-sg-app, kb-sg-db
Target AWS Architecture
The migrated workload was deployed into a custom Virtual Private Cloud (VPC) designed with security, isolation, and internet accessibility in mind.
Architecture Components
- Amazon VPC: An isolated network environment for the workload. Custom CIDR range
- Public Subnet: Hosts the EC2 instance running the application. Associated with a route table that allows internet access
- Private Subnet: Hosts Amazon RDS. No direct internet exposure for the database layer
- Amazon EC2: Application server migrated from on premises. Sized based on CPU, memory, and storage requirements
- Amazon RDS: Managed relational database service. Stores migrated the database schema and data.
- Internet Gateway: Enables inbound and outbound internet access for the application
1) Planning (Sizing + Prereqs + Design)
1.1 Capture on-prem baseline
Record:
- App server: vCPU, RAM, disk, OS, open ports, dependencies (Java/.NET/Node/PHP), env vars, config files.
- DB: engine/version, size (GB), users/roles, connection string format, required extensions.
1.2 Decide AWS Region + AZ strategy
- Choose a user-nearest region for latency and compliance.
- Use at least two AZ within the same region; add multi-AZ later.
1.3 Choose target instance & storage (EC2)
- Select an instance type similar to on-prem.
- Choose EBS volume size to match on-prem.
1.4 Decide RDS config
- Engine/version must match the current DB.
- Use a General Purpose SSD for storage.
- Set backup retention and maintenance windows.
On-Premises Migration to AWS
On-Prem Workload
| Server Name | Server IP | Description | RAM GB | vCPU | Storage GB |
| Appserv01 | 10.0.0.10 | Python Web -Wiki app | 1 | 1 | 4 |
| Dbserv01 | 10.0.0.31 | MySQL 5.7 Python web – DB Server | 1 | 1 | 2 |
Amazon AWS Cloud
| Instance Name | Service | Type | Region | VPC | Subnet |
| Kb-appp-ec2 | EC2 | T2.micro | Us-east-1 | Kb-mig-vpc | Kb-public-subnet-a |
| Kb-db | RDS-MySQL | T3.micro | Us-east-1 | Kb-mig-vpc | Kb-private-subnet-a |
2) Execution — Infrastructure and Provisioning on AWS
Network build of VPC and subnets (public and private), configuration of EC2 instance (Application Server), and RDS (MySQL Database).
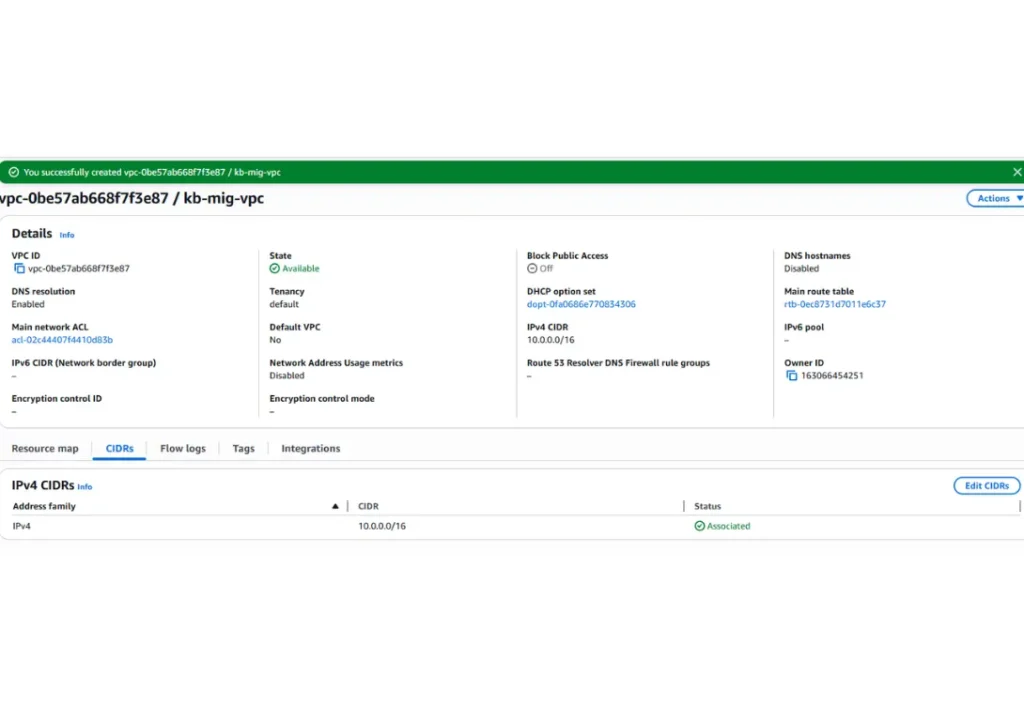
Step 2.1 Create a VPC and CIDR Block Definition
Create VPC ( kb-mig-vpc) with the CIDR: 10.0.0.0/16, ensuring there is no overlap with the on-premises environment.
VPC
- Resources to create: VPC Only
- Name tag: kb-mig-vpc
- IPv4 CIDR: 10.0.0.0/16
Step 2.2 Create Public and Private Subnets.
Create Public Subnet, Private Subnet 1, and Private Subnet 2. To create a database Subnet Group in Amazon RDS, the VPC must have at least two subnets in distinct AZs within the same region. This ensures high availability and supports failover between data centers.
VPC ID: kb-mig-vpc
- Subnet Name: kb–public-subnet -a
- Availability Zone: us-east-1a
- IPv4 subnet CIDR: 10.0.0.0/24
- Subnet Name: kb-private-subnet-a
- Availability Zone: us-east-1a
- IPv4 subnet CIDR: 10.0.1.0/24
- Subnet Name: kb-private-subnet-b
- Availability Zone: us-east-1b
- IPv4 subnet CIDR: 10.0.2.0/24

Step 2.3 Create and attach an Internet Gateway to the VPC
- Create IGW: kb-igw
- Action -> Attach IGW to kb-mig-vpc.
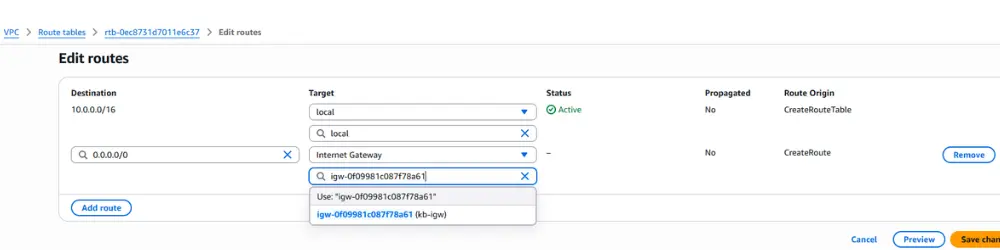
Step 2.4 Configure Route tables for the Internet Gateway
Configuration of the route table to direct traffic (0.0.0.0/0) via the internet gateway.
VPC -> Route tables
Routes
Public route table: Edit routes
-
- Add route 0.0.0.0/0
- Target: kb-igw
- Associate to Public Subnet
The private route table requires no direct internet route for this lab (keep the DB private). Associate with the Private Subnet. As the EC2 instance requires outbound internet access for package installations, place it in a public subnet (as this lab does). For a more locked-down setup, add a NAT Gateway later.
3) Creating Security Groups for Connection
Create a group allowing SSH and internet access to the EC2 instance. MySQL/Aurora traffic (port 3306) is to be associated with the RDS instance.
Step 3.1 Create EC2 security group
EC2 -> Network & Security -> Security Group
Security Group name: kb-sg-app
Description: SSH and internet access
Inbound Security Rules:
- TCP 22 SSH → your IP only
- Custom TCP 8080 → Source: 0.0.0.0/0 (or restrict to corporate IP ranges)
Outbound:
- Allow all outbound (common for app server initially) or restrict later.
Step 3.2 Create RDS
Security group name: kb-sg-db
Description: SG to allow access to MySQL through the EC2 application
Inbound rules:
- MySQL/Aurora
- DB Port MySQL 3306 → source = kb-sg-app only.
- Outbound: Default (RDS-managed) is fine.
Key pattern: DB traffic only from app SG, not internet.
Create a security group
4) Launch EC2 (Application Server)
Provisioning an Ubuntu 22.04 EC2 instance with an instance type, key pair, and attaching the kb-sg-app security group.
Step 4.1 Launch EC2 instance
- Name: kb-app-ec2
- Amazon Machine Image (AMI): Ubuntu Server
- Instance Type: t2.micro or t3.micro (more performance)
- Key Pair: kb-ssh
Edit Network Settings
- VPC: kb-mig-vpc
- Subnet: Public Subnet
- Auto-assign public IP: Enable
- Security group: kb-sg-app
- Storage: size according to your planning
Step 4.3 OS hardening quick checks (minimum)
- Update packages
- Disable password auth if using SSH keys.
- Ensure firewall rules align with SG rules.
Launch instance
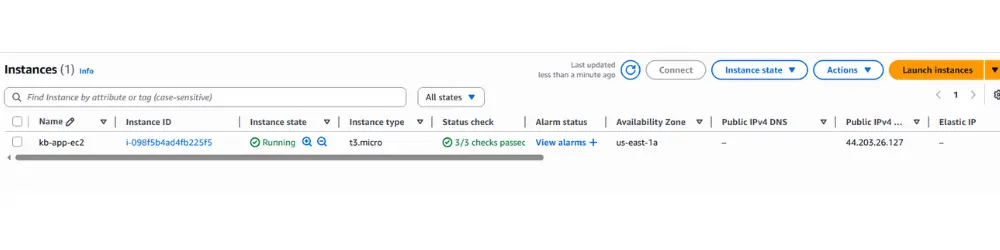
Create an EC2 instance with the operating system specified in the approved migration plan to complete this implementation. This caution is essential to ensure migration applications always run on approved versions, ensuring compatibility, stability, and proper support.
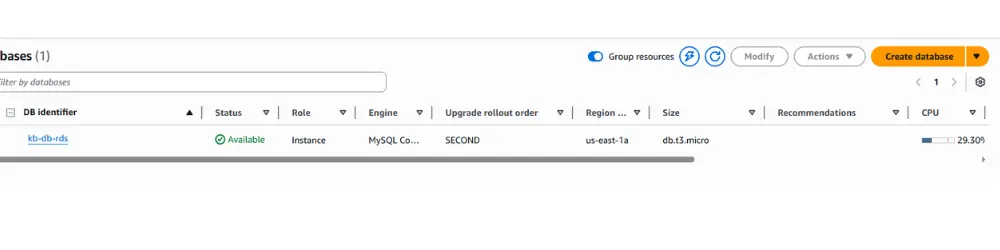
5) Provision the RDS Instance (MySQL Database)
Create an RDS database with MySQL 8.0.x using the free-tier template, while maintaining the previously configured VPC.
Step 5.1 Create RDS instance
Choose a database creation method
- Full configuration
- MySQL
- Engine version: MySQL 8.0.42 or the closest version
- Templates: Sandbox (Oldest free tier)
- Deployment Options: Single-AZ DB instance deployment (1 instance)
Configuration
- DB Instance Name: kb-db-rds
- Master username: admin
- Credentials management: Self-managed
- Master password: admin12345
Instance Configuration
Burstable classes (includes t classes)
- DB instance class: db.t2.micro or db.t3.micro
Connectivity
Don’t connect to an EC2 compute resource
- Virtual private cloud: kb-mig-vpc
- VPC Security Group: kb-sg-db
- Availability Zone: us-east-1a (private subnet)
- Public access: No
- Additional configuration | Database port: 3306
- Security group: kb-sg-db
Click Create database
Although it’s recommended to enable backups for retention, for this lab and to avoid unnecessary charges, don’t enable backups.
Step 5.2 Capture RDS endpoint.
- Save the RDS endpoint hostname and port — you’ll use it in your application. Migrate database data: select your transfer method.
Best when the DB is small to medium and downtime is acceptable.
Typical flow
- Export dump from on-prem DB (tool depends on engine)
- Copy dump to EC2 (or your workstation)
- Restore into RDS
- Validate schema + row counts + app connectivity.
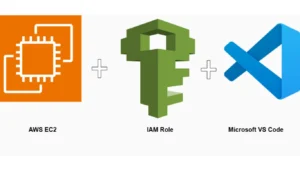
Accessing EC2 with VS Code (Remote Explorer)
Diagnose connection failures if the Internet Gateway or routes are not configured. VS Code – Remote Explorer (Extension). Open VS Code with the extension installed, access Remote Explorer, and configure:
EC2 Instance IP Address:
    - **Host**
    - **HostName**
- **Path to Private SSH Key File**
- **User for EC2 Connection**

Host 18.213.245.227
  HostName 18.203.240.222
  IdentityFile c:\aws-lab\aws-ssh-kloudbyte.pem
  User ubuntu
Step 5.3 Install Application Packages and Dependencies on EC2
Install the same runtime stack you had on-prem (JDK/.NET runtime/Node/PHP/web server)
sudo apt update

sudo apt install python3-dev -y

sudo apt install python3-pip -y

sudo apt install build-essential libssl-dev libffi-dev -y

sudo apt-get install mysql-client -y    # Install the MYSQL client to enable communication with the RDS instance and facilitate data import
Connection to the RDS Database via MySQL Client
Connect using the RDS endpoint and credentials admin/admin12345. Use already copy Endpoint of your RDS
mysql -h YOUR-RDS-ENDPOINT -P 3306 -u admin -p
Example:
mysql -h awsuse1db01.culdx6558fqq.us-east-1.rds.amazonaws.com -P 3306 -u admin -p
Password: admin12345
Creation and Configuration of the wikidb Database
Create the wikidb database, import the data dump, and validate the tables.
show databases;

create database wikidb;

show databases;

use wikidb;

show tables;
6) Dry-Run Validation (Before Cutover)
Step 6.1 Validate network access.
- From your laptop: hit http://<EC2-public-ip> or your domain (if configured)
- Confirm the security group inbound allows the port you’re testing. 8080
Step 6.2 Validate app → DB connectivity.
From EC2:
- Verify the app can resolve the RDS endpoint (DNS working)
- Run a simple DB connection test (engine-specific)
- Confirm application login / key workflows work.
Step 6.3 Validate data consistency.
- Compare key tables row counts between on-prem and RDS (sample critical tables)
- Validate app reads/writes correctly.
Step 6.4 Document results
- Issues found and fixes applied.
- Final checklist readiness for cutover
7) Final Migration (Cutover)
Step 7.1 Freeze writes on-prem (critical)
- Put the app in maintenance mode or stop services to prevent new DB writes.
- Communicate the downtime window.
Step 7.2 Final sync
- If dump/restore take a final dump and restore to RDS.
- If DMS: wait for minimal replication lag, then stop source writes and let DMS catch up.
Step 7.3 Switch production traffic to AWS
- Update DNS record (recommended), OR update load balancer route, OR change public endpoint to EC2
- Keep TTL low ahead of time (DNS best practice)
Step 7.4 Validate production.
- Smoke test from the external network
- Confirm logs show healthy DB connections.
- Confirm user login + primary workflows.
8) Post Go-Live (Operate + Secure + Optimize)
Step 8.1 Monitoring basics
- Enable CloudWatch metrics/alarms for EC2 and RDS.
- Confirm backups and snapshots for RDS.
Step 8.2 Security hardening checklist (quick wins)
- Restrict SSH to corporate IPs only.
- Force HTTPS (TLS) for app
- Store secrets in AWS Secrets Manager (recommended)
- Ensure RDS is private and only accessible from kb-sg-app
- Apply least-privileged IAM roles to EC2 instances.
Step 8.3 Cost and reliability improvements (next iteration)
- Add ALB + Auto Scaling for the app.
- Convert RDS to Multi-AZ for higher availability.
- Add a NAT Gateway if you later move EC2 into a private subnet.
9) Rollback Plan (Don’t Skip This)
If go-live fails:
- Revert DNS to the on-prem endpoint.
- Re-enable on-prem application services
- If data diverged, decide the authoritative source (usually on-prem if rollback happens fast)
- Document incident + fix before next cutover
Conclusion
After completing the project, delete all created resources! Keeping active resources can result in credit consumption or unnecessary costs. Immediate removal ensures the environment remains clean and within the Free Tier limit.